Showing posts with label northumberland. Show all posts

Sunday, 26 August 2018

Mixing It Up With Imagination Crafts

Hello!

Welcome to my first blog as part of the Imagination Crafts Design Team.


I'm delighted to be able to share with you projects I've made for Hochanda shows featuring the amazing range of products from Sue & the team at Imagination Crafts.

Let's start with a real splash of colour!


I loved making this bright tag for the August One Day Special show on Hochanda. It was the perfect way to play with lots of fabulous Imagination Crafts goodies & some of my favourite techniques.

Here's how I did it.


 I used Imagination Crafts black gesso to cover my tag.


Next I used the 'Harlequin' stencil and applied Imagination Crafts white gesso through the the stencil using a sponge.


 Using sponge again I applied Imagination Crafts Mixed Media Sprays in Blue, Fuchsia and Purple. Just spray a small amount on your sponge at close range then dab it through your stencil.


I then stamped through the stencil using a permanent ink and an Imagination Crafts Texture Art stamp.


Next I removed the 'Harlequin' stencil and switched to the A4 Dragonfly Textures Stencil to add the white details with white gesso and a sponge again.


 I then added white heat embossed swirls from the Texture Art Stamp set above. I then stippled some of the Chickenwire Magicutz with Gold Starlight paint (not shown)


 On a piece of matte black cardstock, I stencilled a white gesso dragonfly and over stamped it with clear heat embossed detail using the leaf vein stamp from the Texture Art Stamp set above.


 I then spritzed the dragonfly using Imagination Crafts Mixed Media sprays in green and light blue before cutting it out.
I stuck the Magicutz & dragonfly onto my tag using Magi-bond.


Don't miss Sue and Imagination Crafts on Hochanda (Sky 673, Freeview 85, Freesat 817) on 

Saturday 1st August at 9am, 1pm & 5pm

All products used are available at www.crafterscompanion.co.uk

Thursday, 26 July 2018

Did you miss me?

Seems ages since I had the chance to blog but this morning I got up extra early to catch up with you guys.

So, where have I been? 

Well, where to start?  We've moved! Yup, I decided that my last shop was not in the right place so I closed it and moved everything to a fabulous little 300 year old barn at Kirkharle, in the heart of my beautiful home county, Northumberland. And I love it!!


The new studio is set in Kirkharle Courtyard, a 17th century manor house & farm which was the birthplace of renowned landscape architect Lancelot Capability Brown.


The courtyard is also home to a number of other creatives along with a farm shop selling Northumbrian fayre and the most  amazing cafe (oops, there goes the diet!).

As you can imagine moving everything from a large shop to a small studio wasn't easy but with lots of help from family and friends (thank you  Paul, Caitlin, Simon, Nikki & James!) we did it.


Not only did we change premises but we also changed names so I'm delighted to introduce you to The Creative Chicken!


So, that's one of the things I've been up to since we last saw each other but there is so much more to tell you all so see you soon!

Wendy x

Friday, 22 December 2017

Woah....What a Year!

Here I am, sitting in the shop on our last working day before we close for Christmas and suddenly I realise that I haven't blogged for about 5 months!!

Why, I ask you say? How can I let you all down like this? Have I deserted you? NO!

I've had a real mad last half of the year!

Last time we spoke I had just become a certified Powertex Tutor (yay!!) well since then not only have I run oodles of Powertex workshops (as well as all the other art journaling, card making & mixed media classes I do) but I have also become Level 2 Certified meaning I now teach Stone Art too!.

Rather than waffle on about what I've been up to I thought I'd show you so here is a sneak peak into my crazy, messy world over the last 5 months....

Powertex Dream Catcher


Powertex Green Man Garden Plaque

Powertex Goblets

Having fun in a Powertex workshop


Powertex Fairy Houses

Stoner Art Heart

Art Journaling (classes at Craftsite every other Thursday)

Powertex Lantern

Powertex Christmas Robin

Powertet Hartley Hare
(workshop at Craftsite on Friday 12th January)
Book Here

Mucky Mitts Kids Club
Powertex Ivory Angel
Powertex Magic Wand
Mucky Mitts Kids with their Magic Wands
Papercraft Christmas Decorations

Stone Art Seahorse

Stone Art Cherub Wreath

Cardmaking Class every Tuesday & Thursday morning at Craftsite

A bit of paper folding

Art Journalling

Book Folding Christmas Tree

Powertex Christmas Baubles

Powertex Garden Plaque

Mucky Mitts Playing with Powertex

Mixed Media Canvas

Mixed Media Journals

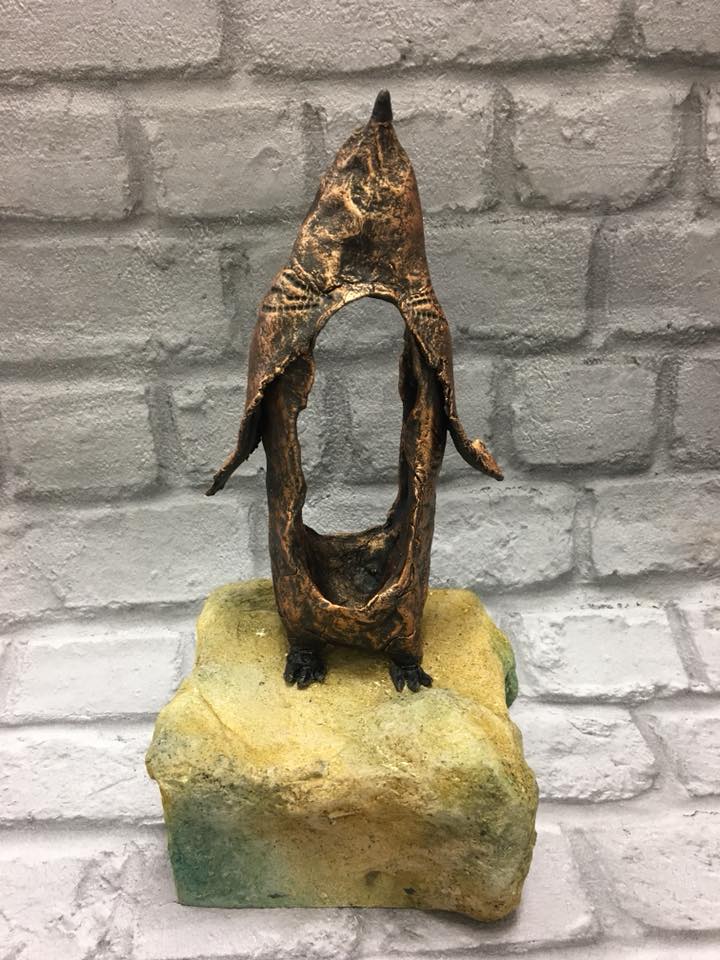
Percy Penguin
Workshop at Craftsite on Saturday 20th January.
Book Here

So that's just a little of what I've been up to whilst I've been away.
If you'd like to know more, or find out about my classes & workshops follow me on social media.

   
@powertex_ne


Have a great Christmas & a very crafty 2018!


Saturday, 17 December 2016

Altered Bottle


 Hello again!
Welcome to this week's blog where I want to share with you an altered bottle I created.
My inspiration was shipwreck treasure found under the sea. I wanted the piece to use blues (my favourite colour) and purples, and to have a lot of texture.


 To begin I took an empty wine bottle and used Art Basics Soft Gloss Gel to cover it with a base layer of burlap.


This was just to give the bottle texture so that my next layers would stick to it better.


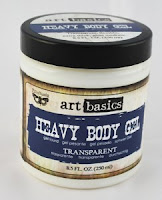
I then cut up strips of old fabric and lace. I dipped these in Finnabair's Sculpture Medium (natural beige) which I diluted about 50-50 with water. I squeezed off excess medium then added the fabric strips to the bottle. I made sure to fold and crinkle the fabric for texture. I used dollops of Heavy Body Gel to hold the fabric in place where I felt it was needed.


Next I added embellishments from my stash along with Malange Pebbles, art stones and mini art stones, again using the heavy body gel. I allowed everything to dry overnight.


Once the piece was completely dry the sculpting medium had stiffened the fabric. I then sprayed the bottle with inks from Dylusions


You will see that the dye did not immediately soak into the fabric. That was ok, as I next dry brushed the piece with a white gesso wash. This spread the dye over the whole piece.

It is important when using this dry brushing technique to keep cleaning your brushes or you will end up with your work all one homogenous colour rather than the areas of different colours.

I kept repeating the dry brushing, drying the work with my heat tool in between layers, until I was happy with the colours.


You will see how this technique gave definition to the folds in the fabric.

Next I repreated the dry brushing but this time with IndigoBlu Goldfinger acrylic paint to add a touch of richness to the bottle.


I also used this to paint the embellishments and some cord I had twisted around the neck of the bottle so they stood out.

After this, I splattered paints onto the bottle using my Tim Holtx Splatter Brush.


I used Titanium White acrylic paint and IndigoBlu Goldfiner, Aladdin and Kingfisher Blue Acrylic for the splattering.


To finish to bottle off I added some of Finnabair's Art Glitter from the Caribbean Seas collection with soft gloss gel.


If you enjoyed this project you can follow my blog by going to bloglovin.com or downloading the Bloglovin' App.

If I have inspired you to try a bit of mixed media you can find the supplies I used in our online shop (just click the links) or pop in and see us at Craftsite in Cramlington, Northumberland if you are passing!

I would love to see your mixed-media art. Please share it on Instagram and tag me @craftsiteshop.