Showing posts with label gesso. Show all posts

Sunday, 26 August 2018

Mixing It Up With Imagination Crafts

Hello!

Welcome to my first blog as part of the Imagination Crafts Design Team.


I'm delighted to be able to share with you projects I've made for Hochanda shows featuring the amazing range of products from Sue & the team at Imagination Crafts.

Let's start with a real splash of colour!


I loved making this bright tag for the August One Day Special show on Hochanda. It was the perfect way to play with lots of fabulous Imagination Crafts goodies & some of my favourite techniques.

Here's how I did it.


 I used Imagination Crafts black gesso to cover my tag.


Next I used the 'Harlequin' stencil and applied Imagination Crafts white gesso through the the stencil using a sponge.


 Using sponge again I applied Imagination Crafts Mixed Media Sprays in Blue, Fuchsia and Purple. Just spray a small amount on your sponge at close range then dab it through your stencil.


I then stamped through the stencil using a permanent ink and an Imagination Crafts Texture Art stamp.


Next I removed the 'Harlequin' stencil and switched to the A4 Dragonfly Textures Stencil to add the white details with white gesso and a sponge again.


 I then added white heat embossed swirls from the Texture Art Stamp set above. I then stippled some of the Chickenwire Magicutz with Gold Starlight paint (not shown)


 On a piece of matte black cardstock, I stencilled a white gesso dragonfly and over stamped it with clear heat embossed detail using the leaf vein stamp from the Texture Art Stamp set above.


 I then spritzed the dragonfly using Imagination Crafts Mixed Media sprays in green and light blue before cutting it out.
I stuck the Magicutz & dragonfly onto my tag using Magi-bond.


Don't miss Sue and Imagination Crafts on Hochanda (Sky 673, Freeview 85, Freesat 817) on 

Saturday 1st August at 9am, 1pm & 5pm

All products used are available at www.crafterscompanion.co.uk

Saturday, 17 December 2016

Altered Bottle


 Hello again!
Welcome to this week's blog where I want to share with you an altered bottle I created.
My inspiration was shipwreck treasure found under the sea. I wanted the piece to use blues (my favourite colour) and purples, and to have a lot of texture.


 To begin I took an empty wine bottle and used Art Basics Soft Gloss Gel to cover it with a base layer of burlap.


This was just to give the bottle texture so that my next layers would stick to it better.


I then cut up strips of old fabric and lace. I dipped these in Finnabair's Sculpture Medium (natural beige) which I diluted about 50-50 with water. I squeezed off excess medium then added the fabric strips to the bottle. I made sure to fold and crinkle the fabric for texture. I used dollops of Heavy Body Gel to hold the fabric in place where I felt it was needed.


Next I added embellishments from my stash along with Malange Pebbles, art stones and mini art stones, again using the heavy body gel. I allowed everything to dry overnight.


Once the piece was completely dry the sculpting medium had stiffened the fabric. I then sprayed the bottle with inks from Dylusions


You will see that the dye did not immediately soak into the fabric. That was ok, as I next dry brushed the piece with a white gesso wash. This spread the dye over the whole piece.

It is important when using this dry brushing technique to keep cleaning your brushes or you will end up with your work all one homogenous colour rather than the areas of different colours.

I kept repeating the dry brushing, drying the work with my heat tool in between layers, until I was happy with the colours.


You will see how this technique gave definition to the folds in the fabric.

Next I repreated the dry brushing but this time with IndigoBlu Goldfinger acrylic paint to add a touch of richness to the bottle.


I also used this to paint the embellishments and some cord I had twisted around the neck of the bottle so they stood out.

After this, I splattered paints onto the bottle using my Tim Holtx Splatter Brush.


I used Titanium White acrylic paint and IndigoBlu Goldfiner, Aladdin and Kingfisher Blue Acrylic for the splattering.


To finish to bottle off I added some of Finnabair's Art Glitter from the Caribbean Seas collection with soft gloss gel.


If you enjoyed this project you can follow my blog by going to bloglovin.com or downloading the Bloglovin' App.

If I have inspired you to try a bit of mixed media you can find the supplies I used in our online shop (just click the links) or pop in and see us at Craftsite in Cramlington, Northumberland if you are passing!

I would love to see your mixed-media art. Please share it on Instagram and tag me @craftsiteshop.


Monday, 5 December 2016

It's beginning to look a lot like Christmas…


Welcome to December!
I'm hopelessly behind with my holiday preperations but I have found time to make these cute little mixed-media wreath ornaments.


I started off by cutting a circle from strong black card stock and sticking a ring of buttons around the edge using my hot glue gun (I made sure that about 1/3 of each button overlapped the edge of the card circle). I left a gap at the top of the circle so that I could add my hanger & ribbon later.


I then added a layer of smaller buttons onto of the first layer as shown below. Try to choose a few buttons with text or detail on them as this will add texture later.

Next, I added a couple of embellishments from my Finnabair Mechanicals stash to the centre of the wreath using Art Basics Heavy Body Gel.


I then added a couple of beads I had lying around and filled in some of the gaps around the embellishments with Finnabair's Art basics Art Stones and mini-art stones. This also gives you some great textures.


Once the gel was dry (you can speed this up with a heat tool) I painted everything with a coat of Pebeo Black Gesso and dried it off.


Now everything was black, the magic could begin! I dry brushed my wreath with Finnabair's Art Basics Opal Magic. I used two different colours to get the effect I wanted, dry brushing one onto of the another. The magic of these paints is that they change colour depending on the colour you paint them over so you end up with a subtle range of tones.


You can add more colour to certain areas to give the wreath a 'worn' effect and make elements stand out.


I wanted the ribbon to have a vintage feel to it so I simply dry brushed double sided black satin ribbon with my opal-magic paint. As well as giving the vintage look to the ribbon, this has the added bonus of helping stiffen the ribbon slightly so it keeps it's shape better.

I glued a key ring chain in the centre of the 'gap' on my wreath to hang it, then made a bow from my satin ribbon and attached that with hot glue.


I hope you enjoyed this project. 

Don't forget to follow the blog and if I have inspired you to try a bit of mixed media you can find the supplies I used in our online shop (just click the links) or pop in and see us at Craftsite in Cramlington, Northumberland if you are passing!

I would love to see your mixed-media art. Please share it on Instagram and tag me @craftsiteshop.


Supplies used are available to order from Craftsite.co.uk. Just click the item to go to the website.

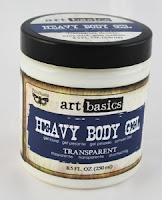
Art Basics Heavy Body Gel


Pebeo  Gesso

Art Stones
Opal Magic Acrylic Paint