Showing posts with label paper craft. Show all posts

Sunday, 26 August 2018

Mixing It Up With Imagination Crafts

Hello!

Welcome to my first blog as part of the Imagination Crafts Design Team.


I'm delighted to be able to share with you projects I've made for Hochanda shows featuring the amazing range of products from Sue & the team at Imagination Crafts.

Let's start with a real splash of colour!


I loved making this bright tag for the August One Day Special show on Hochanda. It was the perfect way to play with lots of fabulous Imagination Crafts goodies & some of my favourite techniques.

Here's how I did it.


 I used Imagination Crafts black gesso to cover my tag.


Next I used the 'Harlequin' stencil and applied Imagination Crafts white gesso through the the stencil using a sponge.


 Using sponge again I applied Imagination Crafts Mixed Media Sprays in Blue, Fuchsia and Purple. Just spray a small amount on your sponge at close range then dab it through your stencil.


I then stamped through the stencil using a permanent ink and an Imagination Crafts Texture Art stamp.


Next I removed the 'Harlequin' stencil and switched to the A4 Dragonfly Textures Stencil to add the white details with white gesso and a sponge again.


 I then added white heat embossed swirls from the Texture Art Stamp set above. I then stippled some of the Chickenwire Magicutz with Gold Starlight paint (not shown)


 On a piece of matte black cardstock, I stencilled a white gesso dragonfly and over stamped it with clear heat embossed detail using the leaf vein stamp from the Texture Art Stamp set above.


 I then spritzed the dragonfly using Imagination Crafts Mixed Media sprays in green and light blue before cutting it out.
I stuck the Magicutz & dragonfly onto my tag using Magi-bond.


Don't miss Sue and Imagination Crafts on Hochanda (Sky 673, Freeview 85, Freesat 817) on 

Saturday 1st August at 9am, 1pm & 5pm

All products used are available at www.crafterscompanion.co.uk

Sunday, 11 December 2016

Believe in the Magic

Hi Everyone!

How are your holiday preparations going?

Are you like me, a boxaholic? I can't throw out a good box so today I'm going to show you how I upcycled an empty chocolate box from last Christmas into a decoration for this Christmas.


I started out with a triangular shaped box. I loved the shape & the acetate 'window', and thought it would make a great frame for a winter scene.


First of all I masked off the acetate window then painted the box light blue using IndigoBlu English Cottage Paints Acrylic in Grandma's Teacup.


Once dry, I used IndigoBlu English Cottage Paints Acrylic in Park Lane to dry brush the box so it had almost a washed wood effect. I repeated this with a basic acrylic paint in Titanium White.
Next I grabbed my Tim Holtz Splatter Brush and splattered the box with watered down titanium white acrylic. I love this effect!

For the inside of the box I wanted to create a winter scene so I cut a piece of stamping card to fit my box (plus extra on the bottom to fold up, as seen in the picture. Why? You'll see later!)


I created the background by blending Tim Holtz Disstress inks in, from top to bottom, Black Soot, Faded Jeans & Broken China. I left the bottom section white. To create the mountain range I simply tore the edge of a piece of scrap card and used it as a stencil over which I blended Weathered Wood Distress Ink.

I wanted to have a 'snowing' effect so I reached for my Tim Holtz Splatter Brush again and dipped it in water. I then splattered the water across my background and quickly mopped it off by rolling a kitchen roll across it. This gave me what looked like snow fall in the distance but I wanted to get a more 3 dimensional effect so I then mixed a little water with Titanium White acrylic paint at splattered again with my trusty splatter brush.


I then put the background to one side and started work on the sentiment plaque for the front of the box. I used an mdf 'Believe' and painted it with IndigoBlu English Cottage Paints Acrylic in Park Lane. I then splattered it with more IndigoBlu paints in Vodka Martini and Kingfisher Blue, along with some Titanium White.


To add sparkle I dotted soft body gel in places and sprinkled with glitter from the gorgeous Caribbean Seas set by Finnabair's Art Extravagance.

I next took a scrap of linen and painted it roughly with Titanium White acrylic to stiffen it up. I curled some silver metallic thread into loops and glued it to the linen, Finally I glued the 'Believe' onto the linen.


I went back to my background and folded the extra card at the base to make a shelf. I covered the 'shelf' with Finnabair's Snowpaste and dried it with my heat gun. I also painted some snow paste along the bottom of my acetate section of the box lid to give a snow drift effect.
Then I cut down two model snow coated fir trees, poked them through the the shelf and glued them in place. I fixed my Tim Holtz Mini-lantern to the top of the inside of the box and hid the wire behind my background. The battery holder fit under the shelf.

Finally I popped on the box lid and voila - from empty chocolate box to Christmas ornament.


If you enjoyed this project you can follow my blog by going to bloglovin.com or downloading the Bloglovin' App.

If I have inspired you to try a bit of mixed media you can find the supplies I used in our online shop (just click the links) or pop in and see us at Craftsite in Cramlington, Northumberland if you are passing!

I would love to see your mixed-media art. Please share it on Instagram and tag me @craftsiteshop.


Supplies used are available to order from Craftsite.co.uk. Just click the item to go to the website.

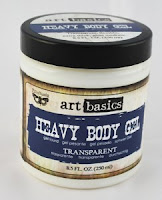
Art Basics Heavy Body Gel
IndigoBlu Acrylic Paint
Tim Holtz Distress Inks

Finnabair Glitter 
Tim Holtz Splatter Brush


SaveSave
SaveSaveSaveSave

Monday, 5 December 2016

It's beginning to look a lot like Christmas…


Welcome to December!
I'm hopelessly behind with my holiday preperations but I have found time to make these cute little mixed-media wreath ornaments.


I started off by cutting a circle from strong black card stock and sticking a ring of buttons around the edge using my hot glue gun (I made sure that about 1/3 of each button overlapped the edge of the card circle). I left a gap at the top of the circle so that I could add my hanger & ribbon later.


I then added a layer of smaller buttons onto of the first layer as shown below. Try to choose a few buttons with text or detail on them as this will add texture later.

Next, I added a couple of embellishments from my Finnabair Mechanicals stash to the centre of the wreath using Art Basics Heavy Body Gel.


I then added a couple of beads I had lying around and filled in some of the gaps around the embellishments with Finnabair's Art basics Art Stones and mini-art stones. This also gives you some great textures.


Once the gel was dry (you can speed this up with a heat tool) I painted everything with a coat of Pebeo Black Gesso and dried it off.


Now everything was black, the magic could begin! I dry brushed my wreath with Finnabair's Art Basics Opal Magic. I used two different colours to get the effect I wanted, dry brushing one onto of the another. The magic of these paints is that they change colour depending on the colour you paint them over so you end up with a subtle range of tones.


You can add more colour to certain areas to give the wreath a 'worn' effect and make elements stand out.


I wanted the ribbon to have a vintage feel to it so I simply dry brushed double sided black satin ribbon with my opal-magic paint. As well as giving the vintage look to the ribbon, this has the added bonus of helping stiffen the ribbon slightly so it keeps it's shape better.

I glued a key ring chain in the centre of the 'gap' on my wreath to hang it, then made a bow from my satin ribbon and attached that with hot glue.


I hope you enjoyed this project. 

Don't forget to follow the blog and if I have inspired you to try a bit of mixed media you can find the supplies I used in our online shop (just click the links) or pop in and see us at Craftsite in Cramlington, Northumberland if you are passing!

I would love to see your mixed-media art. Please share it on Instagram and tag me @craftsiteshop.


Supplies used are available to order from Craftsite.co.uk. Just click the item to go to the website.

Art Basics Heavy Body Gel


Pebeo  Gesso

Art Stones
Opal Magic Acrylic Paint


Sunday, 27 November 2016

Steampunk mini-top hat

Hi everyone,
I can't believe it's blogday again. Where did the week go?
I've been getting messy in the workshop this week steampunking up a mini-top hat favour box I had left over from a wedding.
What do you think?

The favour box was ivory so the first thing I did was cover it with black gesso
I then added a band of fake leather I cut from a strap I salvaged from an old pair of boots (never throw anything out!).


Once the gesso had dried I began to punk up the hat using cogs and elements from my stash including the industrial heart from one of my Finnabair Mechanical's set and a 3 part poinsettia from a Tim Holtz Christmas embellishment set which I put on the top of the hat. 
I also added some chains from a cheap piece of costume jewellery I picked up on sale in Primark from 50p!
I used Art Basics Heavy Body Gel to stick everything as it holds so strong.


I wanted to add a couple of more things that I didn't have ready made in my stash - a clock and some copper piping so I made those myself.
For the clock face I cut a clock from my Tim Holtz Lost & Found paper pad and I stuck it to the bottom of a melange pebble with soft gel paste and left it to one side to dry.
The piping I made by cutting lengths of paper drinking straws then splitting them lengthwise. This allowed me to roll them tight and slide them inside some shorter length of the same paper straws giving me a 'joint' effect.


Once all the gel had dried I grabbed my black gesso again and painted over everything.


The next part is always my favourite. I love taking everything back to black then seeing the details reappear as I apply gilding waxes and paints!

I ran a light coating of Pebeo Renaissance Gold gilding wax over some of the embellishments then took some Art Alchamy Opal Magic in green-gold and dry brushed it across the hat & embellishments.


To finish of I painted the 'pipes' with IndigoBlu Pheasant Bronze acrylic paint and stuck my 'clock' face onto the hat.


Voila! One Steampunk Mini-Top Hat!


I hope you enjoyed this project. 

Don't forget to follow the blog and if I have inspired you to try a bit of mixed media you can find the supplies I used in our online shop (just click the links) or pop in and see us at Craftsite in Cramlington, Northumberland if you are passing!


  I would love to see your mixed-media art. Please share it on Instagram and tag me @craftsiteshop.


Supplies used are available to order from Craftsite.co.uk. Just click the item to go to the website.

Art Basics Heavy Body Gel
Art Basics Soft Matte Gel
Pebeo Gilding Wax
Pebeo  Gesso
IndigoBlu  Acrylic Paint
Tim Holtz Lost & Found Paper Stash