Showing posts with label Christmas. Show all posts

Sunday, 11 December 2016

Believe in the Magic

Hi Everyone!

How are your holiday preparations going?

Are you like me, a boxaholic? I can't throw out a good box so today I'm going to show you how I upcycled an empty chocolate box from last Christmas into a decoration for this Christmas.


I started out with a triangular shaped box. I loved the shape & the acetate 'window', and thought it would make a great frame for a winter scene.


First of all I masked off the acetate window then painted the box light blue using IndigoBlu English Cottage Paints Acrylic in Grandma's Teacup.


Once dry, I used IndigoBlu English Cottage Paints Acrylic in Park Lane to dry brush the box so it had almost a washed wood effect. I repeated this with a basic acrylic paint in Titanium White.
Next I grabbed my Tim Holtz Splatter Brush and splattered the box with watered down titanium white acrylic. I love this effect!

For the inside of the box I wanted to create a winter scene so I cut a piece of stamping card to fit my box (plus extra on the bottom to fold up, as seen in the picture. Why? You'll see later!)


I created the background by blending Tim Holtz Disstress inks in, from top to bottom, Black Soot, Faded Jeans & Broken China. I left the bottom section white. To create the mountain range I simply tore the edge of a piece of scrap card and used it as a stencil over which I blended Weathered Wood Distress Ink.

I wanted to have a 'snowing' effect so I reached for my Tim Holtz Splatter Brush again and dipped it in water. I then splattered the water across my background and quickly mopped it off by rolling a kitchen roll across it. This gave me what looked like snow fall in the distance but I wanted to get a more 3 dimensional effect so I then mixed a little water with Titanium White acrylic paint at splattered again with my trusty splatter brush.


I then put the background to one side and started work on the sentiment plaque for the front of the box. I used an mdf 'Believe' and painted it with IndigoBlu English Cottage Paints Acrylic in Park Lane. I then splattered it with more IndigoBlu paints in Vodka Martini and Kingfisher Blue, along with some Titanium White.


To add sparkle I dotted soft body gel in places and sprinkled with glitter from the gorgeous Caribbean Seas set by Finnabair's Art Extravagance.

I next took a scrap of linen and painted it roughly with Titanium White acrylic to stiffen it up. I curled some silver metallic thread into loops and glued it to the linen, Finally I glued the 'Believe' onto the linen.


I went back to my background and folded the extra card at the base to make a shelf. I covered the 'shelf' with Finnabair's Snowpaste and dried it with my heat gun. I also painted some snow paste along the bottom of my acetate section of the box lid to give a snow drift effect.
Then I cut down two model snow coated fir trees, poked them through the the shelf and glued them in place. I fixed my Tim Holtz Mini-lantern to the top of the inside of the box and hid the wire behind my background. The battery holder fit under the shelf.

Finally I popped on the box lid and voila - from empty chocolate box to Christmas ornament.


If you enjoyed this project you can follow my blog by going to bloglovin.com or downloading the Bloglovin' App.

If I have inspired you to try a bit of mixed media you can find the supplies I used in our online shop (just click the links) or pop in and see us at Craftsite in Cramlington, Northumberland if you are passing!

I would love to see your mixed-media art. Please share it on Instagram and tag me @craftsiteshop.


Supplies used are available to order from Craftsite.co.uk. Just click the item to go to the website.
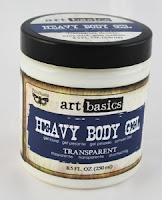
Art Basics Heavy Body Gel
IndigoBlu Acrylic Paint
Tim Holtz Distress Inks

Finnabair Glitter 
Tim Holtz Splatter Brush


SaveSave
SaveSaveSaveSave

Monday, 5 December 2016

It's beginning to look a lot like Christmas…


Welcome to December!
I'm hopelessly behind with my holiday preperations but I have found time to make these cute little mixed-media wreath ornaments.


I started off by cutting a circle from strong black card stock and sticking a ring of buttons around the edge using my hot glue gun (I made sure that about 1/3 of each button overlapped the edge of the card circle). I left a gap at the top of the circle so that I could add my hanger & ribbon later.


I then added a layer of smaller buttons onto of the first layer as shown below. Try to choose a few buttons with text or detail on them as this will add texture later.

Next, I added a couple of embellishments from my Finnabair Mechanicals stash to the centre of the wreath using Art Basics Heavy Body Gel.


I then added a couple of beads I had lying around and filled in some of the gaps around the embellishments with Finnabair's Art basics Art Stones and mini-art stones. This also gives you some great textures.


Once the gel was dry (you can speed this up with a heat tool) I painted everything with a coat of Pebeo Black Gesso and dried it off.


Now everything was black, the magic could begin! I dry brushed my wreath with Finnabair's Art Basics Opal Magic. I used two different colours to get the effect I wanted, dry brushing one onto of the another. The magic of these paints is that they change colour depending on the colour you paint them over so you end up with a subtle range of tones.


You can add more colour to certain areas to give the wreath a 'worn' effect and make elements stand out.


I wanted the ribbon to have a vintage feel to it so I simply dry brushed double sided black satin ribbon with my opal-magic paint. As well as giving the vintage look to the ribbon, this has the added bonus of helping stiffen the ribbon slightly so it keeps it's shape better.

I glued a key ring chain in the centre of the 'gap' on my wreath to hang it, then made a bow from my satin ribbon and attached that with hot glue.


I hope you enjoyed this project. 

Don't forget to follow the blog and if I have inspired you to try a bit of mixed media you can find the supplies I used in our online shop (just click the links) or pop in and see us at Craftsite in Cramlington, Northumberland if you are passing!

I would love to see your mixed-media art. Please share it on Instagram and tag me @craftsiteshop.


Supplies used are available to order from Craftsite.co.uk. Just click the item to go to the website.

Art Basics Heavy Body Gel


Pebeo  Gesso

Art Stones
Opal Magic Acrylic Paint


Sunday, 20 November 2016

Mini-Mixed Media in a tin!

Hi everyone, Wendy here again.
Are you a hoarder like me? I can't throw anything away including empty tins and boxes.
So this week, just to prove my husband wrong when he says that I never use all the junk I save, I decided to make a mini-mixed media Christmas tree ornament in a cute little Mento's tin I saved months back.
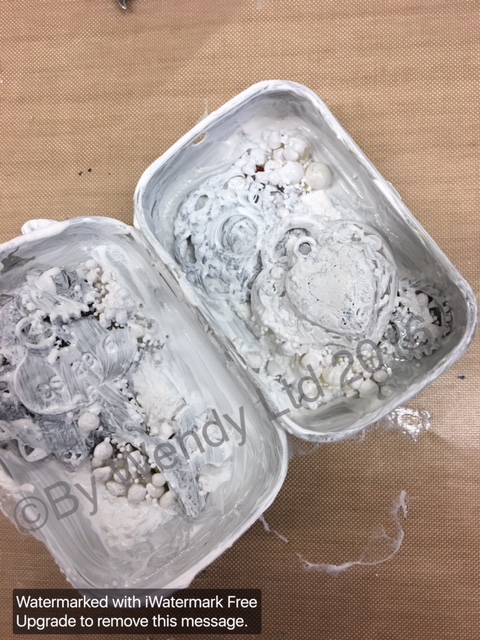
I started off by slapping some rough texture paste onto the inside and outside of the tin and letting it dry. I punched a hole in the top of the inner section of the tin using my Cropadile ready to insert a ribbon for hanging later.


Mentos tin with rough texture paste

Once the texture paste was dry I used Art basics Heavy Body Gel to add embellishments from my stash to the outside of the tin. These included the child's face, melange pebbles and art stones by Finnabair and metal leaves from Tim Holtz.

Add embellishments with Heavy Body Gel

When the gel was dry I opened the tin and added more elements to the inside.


Once all was dry I gave areas of tin or metal still showing a touch of white gesso so my inks in the next stage had something to grip onto.


After a quick blast with my heat tool to make sure the gesso was thoroughly dry, I spritzed the inside and outside of the tin with Dylusions Ink (drying with my heat tool between sprays).


I decided that I wanted the ornament to look as if the closed tin had been lost for years so the colour had faded outside but when it was opened it would reveal vibrant colours.

To get the faded effect I used a technique I picked up from Finnabair during a recent workshop I attended. I used white gesso and dry brushed the outside of the tin. It's important that your brush is pretty dry for this as if wet you will simply move the inks around. I repeatedly dry brushed with white gesso, drying in between each brushing, until I was happy with the level of 'fade' on the tin.

Next, I used Pebeo Rennaisance Gold gilding wax on the tip of my finger to highlight details. To add depth I then dry brushed the whole outside of the tin with Goldfinger acrylic paint from the English Cottage range by Indigoblu.


Once happy with the outside, I opened the tin to reveal the more vibrant colours inside. Again I highlighted with the gilding wax then I added some sparkle using Finnabair's amazing glitters and Soft Matte Gel. The glitters are amazing! I used two shades from the Crimson set and a goldish shade from the Ebony & Ivory set.
To finish off I took some 5mm double sided satin ribbon in scarlet and dry brushed it with the Goldfinger acrylic paint I had used earlier. I simply knotted the ribbon and threaded it through the hole I had punched in the top of the tin.

All ready for my Christmas tree.


If you have been inspired to try a little mixed media for yourself I would love to see your art. Please share it on Instagram and tag me @craftsiteshop.


Supplies used are available to order from Craftsite.co.uk. Just click the item to go to the website.

Art Basics Heavy Body Gel
Art Basics Soft Matte Gel
Pebeo Gilding Wax
Pebeo  Gesso
Goldfinger Acrylic Paint

Finnabair Glitter Crimson