How are your holiday preparations going?
Are you like me, a boxaholic? I can't throw out a good box so today I'm going to show you how I upcycled an empty chocolate box from last Christmas into a decoration for this Christmas.
I started out with a triangular shaped box. I loved the shape & the acetate 'window', and thought it would make a great frame for a winter scene.
First of all I masked off the acetate window then painted the box light blue using IndigoBlu English Cottage Paints Acrylic in Grandma's Teacup.
Once dry, I used IndigoBlu English Cottage Paints Acrylic in Park Lane to dry brush the box so it had almost a washed wood effect. I repeated this with a basic acrylic paint in Titanium White.
Next I grabbed my Tim Holtz Splatter Brush and splattered the box with watered down titanium white acrylic. I love this effect!
For the inside of the box I wanted to create a winter scene so I cut a piece of stamping card to fit my box (plus extra on the bottom to fold up, as seen in the picture. Why? You'll see later!)
I created the background by blending Tim Holtz Disstress inks in, from top to bottom, Black Soot, Faded Jeans & Broken China. I left the bottom section white. To create the mountain range I simply tore the edge of a piece of scrap card and used it as a stencil over which I blended Weathered Wood Distress Ink.
I wanted to have a 'snowing' effect so I reached for my Tim Holtz Splatter Brush again and dipped it in water. I then splattered the water across my background and quickly mopped it off by rolling a kitchen roll across it. This gave me what looked like snow fall in the distance but I wanted to get a more 3 dimensional effect so I then mixed a little water with Titanium White acrylic paint at splattered again with my trusty splatter brush.
I then put the background to one side and started work on the sentiment plaque for the front of the box. I used an mdf 'Believe' and painted it with IndigoBlu English Cottage Paints Acrylic in Park Lane. I then splattered it with more IndigoBlu paints in Vodka Martini and Kingfisher Blue, along with some Titanium White.
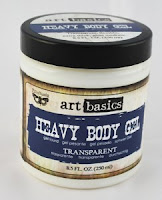
To add sparkle I dotted soft body gel in places and sprinkled with glitter from the gorgeous Caribbean Seas set by Finnabair's Art Extravagance.
I next took a scrap of linen and painted it roughly with Titanium White acrylic to stiffen it up. I curled some silver metallic thread into loops and glued it to the linen, Finally I glued the 'Believe' onto the linen.
I went back to my background and folded the extra card at the base to make a shelf. I covered the 'shelf' with Finnabair's Snowpaste and dried it with my heat gun. I also painted some snow paste along the bottom of my acetate section of the box lid to give a snow drift effect.
Then I cut down two model snow coated fir trees, poked them through the the shelf and glued them in place. I fixed my Tim Holtz Mini-lantern to the top of the inside of the box and hid the wire behind my background. The battery holder fit under the shelf.
Finally I popped on the box lid and voila - from empty chocolate box to Christmas ornament.
If you enjoyed this project you can follow my blog by going to bloglovin.com or downloading the Bloglovin' App.
If I have inspired you to try a bit of mixed media you can find the supplies I used in our online shop (just click the links) or pop in and see us at Craftsite in Cramlington, Northumberland if you are passing!
I would love to see your mixed-media art. Please share it on Instagram and tag me @craftsiteshop.
Supplies used are available to order from Craftsite.co.uk. Just click the item to go to the website.
 |
| IndigoBlu Acrylic Paint |
 |
| Tim Holtz Distress Inks |
 |
| Finnabair Glitter |
 |
| Tim Holtz Splatter Brush |


No comments:
Post a Comment