Monday, 12 June 2017

Hello!
It's been a while since my last crafty blog as I've been tied up with other commitments but it's so good to be back doing what I love!

This week I've been mixing up a lot of products designed by the lovely Anna Dabrowska, otherwise known as Fannabair.

If you know me then you will know I am obsessed with all things beach & sea so I decided that I wanted to make a little undersea treasure that looked like it had laid undisturbed at the bottom of the sea for years. What better to begin with than a fishy tin!

 Firstly I added some pieces of wood to the tin so that I could bring the focal piece I was adding forward a bit.
 I then added some mesh, art stones and a variety of embellishments using Art Basic's Gel. I also glued some twisted cord around the open edge of the tin. I had a seahorse key I wanted to use as the main focal point. Once dry I painted them all with white gesso.
 I then used some Indigo Blu metallic acrylic paints in 'Kingfisher Blue' & 'Goldfinger' to some areas of my piece to pick out certain parts and embellishments.

 Next I splattered my work with a wash of the Kingfisher Blue and again with a wash of white gesso. The Tim Holtz splatter brush is brilliant for this.
 At this point I decided that I wanted the cord around the edge of the box to work as a frame and needed it darker

 so I painted it with black gesso 
  then applied Pebeo gold gilding wax with my finger.
 I then got out the Finnabair Patina Pastes.Wow! I love this set. I applied the coper paint first using an old, firm paintbrush to stipple it on. Whilst it was still wet I repeated the process with the blue and then finally the green paints. Together they give a great verdigris effect to the tin.


 Next I used Finnabair's rust pastes to add areas of rust to the edges and a couple of other areas of the tin. 

If you have been inspired to try a little mixed media for yourself I would love to see your art. Please share it on Instagram and tag me @craftsiteshop.


Saturday, 17 December 2016

Altered Bottle


 Hello again!
Welcome to this week's blog where I want to share with you an altered bottle I created.
My inspiration was shipwreck treasure found under the sea. I wanted the piece to use blues (my favourite colour) and purples, and to have a lot of texture.


 To begin I took an empty wine bottle and used Art Basics Soft Gloss Gel to cover it with a base layer of burlap.


This was just to give the bottle texture so that my next layers would stick to it better.


I then cut up strips of old fabric and lace. I dipped these in Finnabair's Sculpture Medium (natural beige) which I diluted about 50-50 with water. I squeezed off excess medium then added the fabric strips to the bottle. I made sure to fold and crinkle the fabric for texture. I used dollops of Heavy Body Gel to hold the fabric in place where I felt it was needed.


Next I added embellishments from my stash along with Malange Pebbles, art stones and mini art stones, again using the heavy body gel. I allowed everything to dry overnight.


Once the piece was completely dry the sculpting medium had stiffened the fabric. I then sprayed the bottle with inks from Dylusions


You will see that the dye did not immediately soak into the fabric. That was ok, as I next dry brushed the piece with a white gesso wash. This spread the dye over the whole piece.

It is important when using this dry brushing technique to keep cleaning your brushes or you will end up with your work all one homogenous colour rather than the areas of different colours.

I kept repeating the dry brushing, drying the work with my heat tool in between layers, until I was happy with the colours.


You will see how this technique gave definition to the folds in the fabric.

Next I repreated the dry brushing but this time with IndigoBlu Goldfinger acrylic paint to add a touch of richness to the bottle.


I also used this to paint the embellishments and some cord I had twisted around the neck of the bottle so they stood out.

After this, I splattered paints onto the bottle using my Tim Holtx Splatter Brush.


I used Titanium White acrylic paint and IndigoBlu Goldfiner, Aladdin and Kingfisher Blue Acrylic for the splattering.


To finish to bottle off I added some of Finnabair's Art Glitter from the Caribbean Seas collection with soft gloss gel.


If you enjoyed this project you can follow my blog by going to bloglovin.com or downloading the Bloglovin' App.

If I have inspired you to try a bit of mixed media you can find the supplies I used in our online shop (just click the links) or pop in and see us at Craftsite in Cramlington, Northumberland if you are passing!

I would love to see your mixed-media art. Please share it on Instagram and tag me @craftsiteshop.


Sunday, 11 December 2016

Believe in the Magic

Hi Everyone!

How are your holiday preparations going?

Are you like me, a boxaholic? I can't throw out a good box so today I'm going to show you how I upcycled an empty chocolate box from last Christmas into a decoration for this Christmas.


I started out with a triangular shaped box. I loved the shape & the acetate 'window', and thought it would make a great frame for a winter scene.


First of all I masked off the acetate window then painted the box light blue using IndigoBlu English Cottage Paints Acrylic in Grandma's Teacup.


Once dry, I used IndigoBlu English Cottage Paints Acrylic in Park Lane to dry brush the box so it had almost a washed wood effect. I repeated this with a basic acrylic paint in Titanium White.
Next I grabbed my Tim Holtz Splatter Brush and splattered the box with watered down titanium white acrylic. I love this effect!

For the inside of the box I wanted to create a winter scene so I cut a piece of stamping card to fit my box (plus extra on the bottom to fold up, as seen in the picture. Why? You'll see later!)


I created the background by blending Tim Holtz Disstress inks in, from top to bottom, Black Soot, Faded Jeans & Broken China. I left the bottom section white. To create the mountain range I simply tore the edge of a piece of scrap card and used it as a stencil over which I blended Weathered Wood Distress Ink.

I wanted to have a 'snowing' effect so I reached for my Tim Holtz Splatter Brush again and dipped it in water. I then splattered the water across my background and quickly mopped it off by rolling a kitchen roll across it. This gave me what looked like snow fall in the distance but I wanted to get a more 3 dimensional effect so I then mixed a little water with Titanium White acrylic paint at splattered again with my trusty splatter brush.


I then put the background to one side and started work on the sentiment plaque for the front of the box. I used an mdf 'Believe' and painted it with IndigoBlu English Cottage Paints Acrylic in Park Lane. I then splattered it with more IndigoBlu paints in Vodka Martini and Kingfisher Blue, along with some Titanium White.


To add sparkle I dotted soft body gel in places and sprinkled with glitter from the gorgeous Caribbean Seas set by Finnabair's Art Extravagance.

I next took a scrap of linen and painted it roughly with Titanium White acrylic to stiffen it up. I curled some silver metallic thread into loops and glued it to the linen, Finally I glued the 'Believe' onto the linen.


I went back to my background and folded the extra card at the base to make a shelf. I covered the 'shelf' with Finnabair's Snowpaste and dried it with my heat gun. I also painted some snow paste along the bottom of my acetate section of the box lid to give a snow drift effect.
Then I cut down two model snow coated fir trees, poked them through the the shelf and glued them in place. I fixed my Tim Holtz Mini-lantern to the top of the inside of the box and hid the wire behind my background. The battery holder fit under the shelf.

Finally I popped on the box lid and voila - from empty chocolate box to Christmas ornament.


If you enjoyed this project you can follow my blog by going to bloglovin.com or downloading the Bloglovin' App.

If I have inspired you to try a bit of mixed media you can find the supplies I used in our online shop (just click the links) or pop in and see us at Craftsite in Cramlington, Northumberland if you are passing!

I would love to see your mixed-media art. Please share it on Instagram and tag me @craftsiteshop.


Supplies used are available to order from Craftsite.co.uk. Just click the item to go to the website.

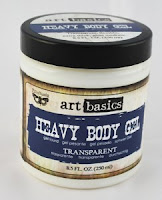
Art Basics Heavy Body Gel
IndigoBlu Acrylic Paint
Tim Holtz Distress Inks

Finnabair Glitter 
Tim Holtz Splatter Brush


SaveSave
SaveSaveSaveSave